I have previously posted about using CutePDF to create pdfs from Excel sheets. There is another way, but it takes a few clicks and it only works in Excel 2010 and later versions. (It may work in Excel 2007 but I have taken that version off my PC so I can’t test it.)
There are couple of ways to get to the required dialog that gives you control over the pdf.
Excel 2010 + later versions
Press F12 and change the file type to PDF.
Excel 2013 + later versions
In the File menu there is an Export option. When you click it you see the image below.
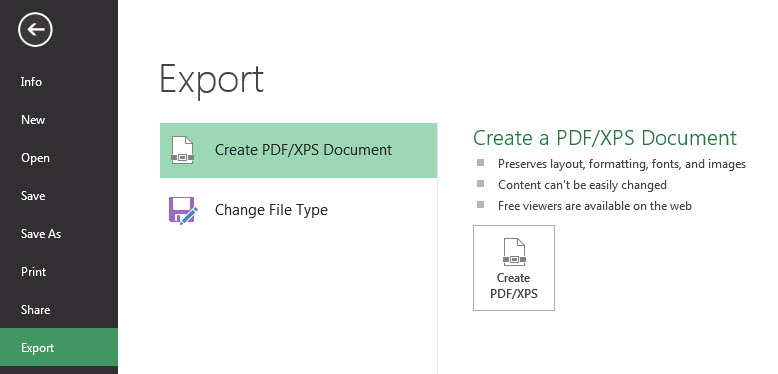
Click the Create PDF/XPS button on the right.
Excel 2010 + later versions
You can change the default settings by clicking the Options button – see image below.

The Options dialog opens (see below) allowing you to control exactly what is published. Make any changes and click OK.

On the Publish As PDF/XPS or Save As dialog you can click the Publish or Save button to create the pdf.
Note the tick box “Open file after publishing” on the left of the Options button – this enables you to check the pdf straight away.
To get around the number of clicks, you could record a macro and it will look something like the one below in Excel 2013.
Sub Create_pdf() ActiveSheet.ExportAsFixedFormat Type:=xlTypePDF, Filename:= _ "E:\A4\Timesheet.pdf", Quality:=xlQualityStandard, IncludeDocProperties _ :=True, IgnorePrintAreas:=False, OpenAfterPublish:=True End Sub |
See this blog post on how to run a macro from the Quick Access Toolbar.
See this blog post on using macros.
Please note: I reserve the right to delete comments that are offensive or off-topic.