When you are setting up a protected sheet that allows users to make inputs, a few option changes can make the user’s experience a lot easier.
Applying protection to a sheet in Excel is not an intuitive exercise. Some people think the process is bank to front.
All cells in a sheet are locked as the default setting. You must unlock any input cells before applying sheet protection. The unlocking process is a format change – not intuitive.
When you apply sheet protection there are a number of options that you can tick to give the user greater access to make changes to the sheet. If you accept the defaults the user will have very limited ability to make changes to the sheet.
Two common options that can assist users when inputting are the ability to change the cell colour or format and the ability to add a cell comment. Both of these are turned off in the default protection settings. The setting to allow cell comments is not very obvious.
Unprotecting Cells
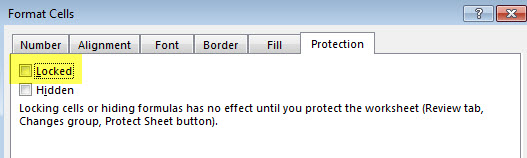
To unlock a cell or range first select it and then press Ctrl +1 to open the Format Cells dialog. Then click the Protection tab and uncheck the Locked option and click OK. See image below.
When creating input cells it is best practice to format them differently than other cells. You could use Excel’s built-in style for input cells – see image below.

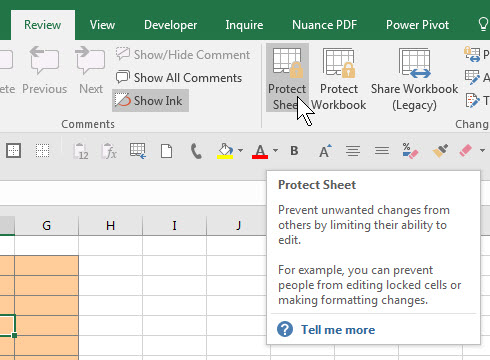
Once you have unlocked all of the input cells and formatted them, you are ready to protect the sheet. Sheet protection is under the Review tab – see image below.
Once you click the Protect Sheet icon then the Protect Sheet dialog will display. The top two ticked options are the defaults. You might want to consider adding the next three format options as well. See image below.
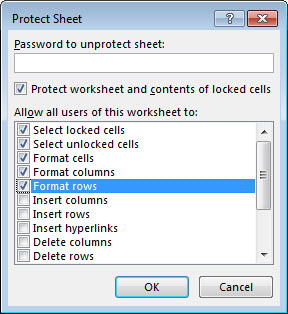
This gives users the ability to change the format of the cell. For example this can be useful if they need to change the cell colour to highlight an unusual figure.
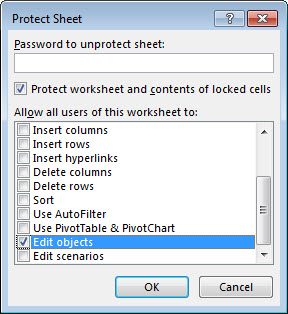
To enable users to add a cell comment to an input cell then you need to also tick an option that you need to scroll down to see – see image below. The option is Edit objects.
Once you have made your selections you can then add a password and click OK. You will be asked to confirm the password before continuing. Please make sure you make a note of the password because you will need it to unprotect the sheet.
Note you do not have to provide a password. If you don’t then the sheet will still be protected but the users will be able to unprotect the sheet without a password. This is useful if you want to prevent accidental changes to a sheet. It doesn’t provide any protection in terms of stopping people making changes.
Please note: I reserve the right to delete comments that are offensive or off-topic.