Excel allows you to easily hide and unhide rows and columns using a feature called grouping. There are two keyboard shortcuts that allow you to apply and remove grouping. These shortcuts can also be used to amend existing groupings.
Even though I will use rows to demonstrate these techniques, they also apply to grouped columns.
Keyboard shortcuts
There are two keyboard shortcuts for grouping. One to apply grouping and one to remove grouping.


In the image below see the steps used to insert 3 separate row groupings to enable hiding and unhiding of the rows.
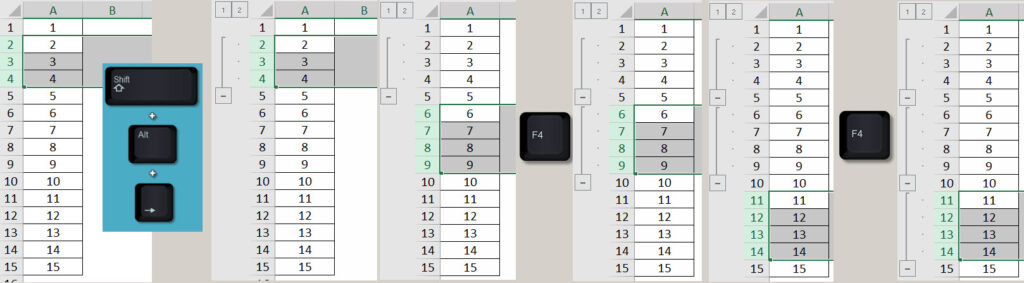
Note: once you have used the grouping shortcut once, you can then select a range and press the F4 function key to repeat adding grouping.
When applying grouping you select the rows you want to hide when the grouping minus icon is clicked – the image below shows all the rows hidden.
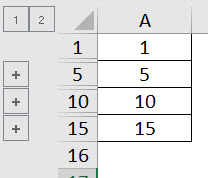
Row 1 was not included in the above grouping. To add it to the grouping you can select the whole row and press the add grouping keyboard shortcut – see image below.

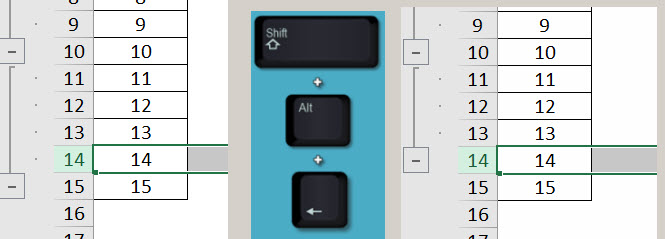
If you want to remove the grouping on row 14 you can select the row and press the remove grouping shortcut – see image below.
If you click in the middle of a group and press remove grouping it creates two separate groupings – see image below.
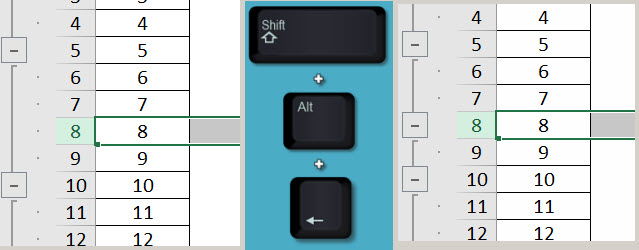
These shortcuts save you having to remove the whole grouping and re-apply it if you only need to add or remove a row or two.
Please note: I reserve the right to delete comments that are offensive or off-topic.