I started using Excel in the late 80’s on a Mac. It had a Save and Close button. When I discovered VBA in Excel on the PC, the very first macro I ever made was save and close.
I thought this would be a good example to take you through creating a macro from scratch and sharing a technique to make it easy to use.
The assumption for this macro is that the file has already been saved. I won’t be checking if the file is read-only or is a new file i.e. never been saved. I will do a follow up post on how to handle those two issues.
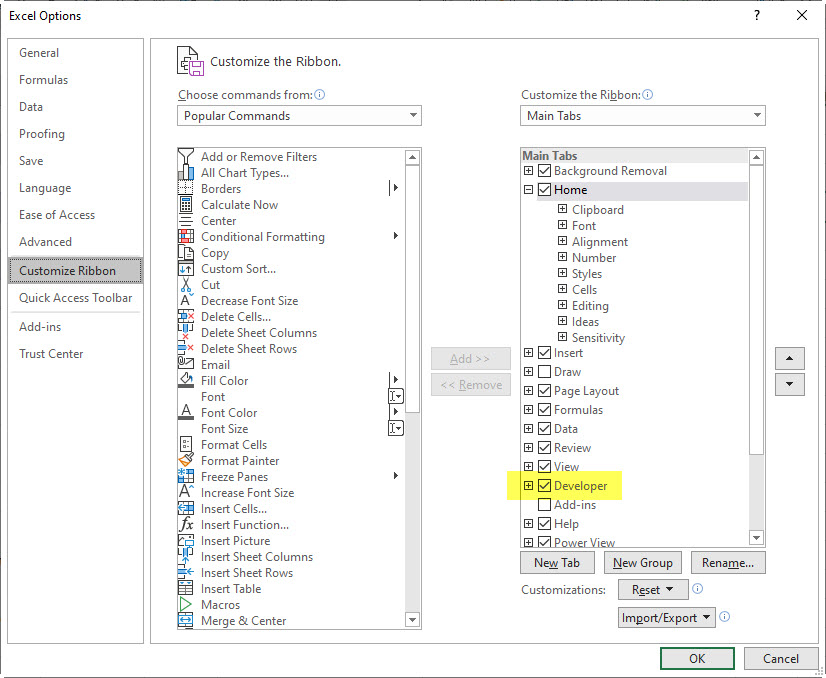
First let’s make sure the Developer tab is visible. Right click the ribbon and choose Customize the Ribbon.
Make sure the Developer ribbon is visible – tick the Developer box and click OK.
Make sure you have a file open that has already been saved. Make sure you also have at least one other Excel file open. We want to make sure excel stays open after you close the file.
On the Developer ribbon (left-hand side) click the Record Macro icon.
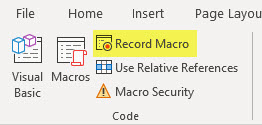
Use the entries in the image below to set up the macro. There is a drop down for Personal Macro Workbook, type the other entries. Note: a macro name cannot contain spaces.
The Personal Macro Workbook is a system generated file that holds your general purpose macros that work in a variety of different files. If you have never recorded a macro this file will be created by Excel – you may need to save it later.
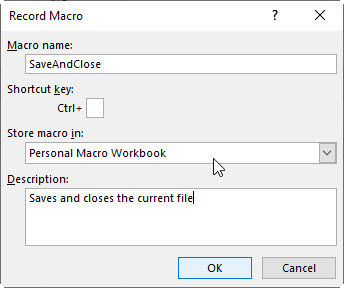
Now press Ctrl + S then press Ctrl + W this saves and closes the current file.
On the Develop tab click the Stop Recording icon.
That’s it, the macro is ready to use.
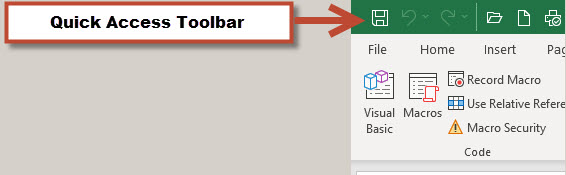
To make the macro easier to use we can link it to an icon on the Quick Access Toolbar.
The Quick Access Toolbar is positioned either above or below the ribbon. I prefer it below the ribbon. It is initially installed above the ribbon see image below.
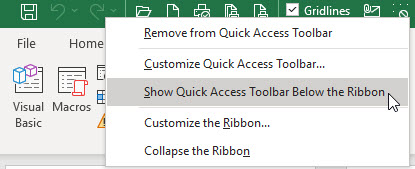
You can right click the Quick Access Toolbar and choose Show Quick Access Toolbar Below the Ribbon – see image below.
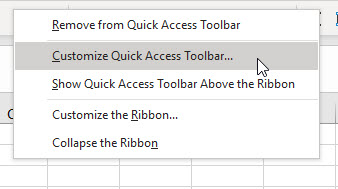
Right click the Quick Access Toolbar again and this time choose Customize the Quick Access Toolbar.
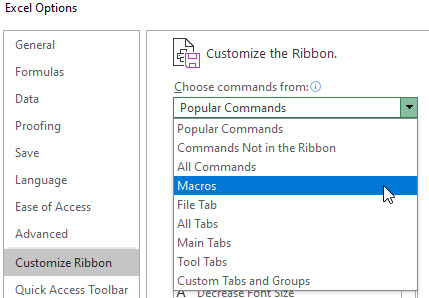
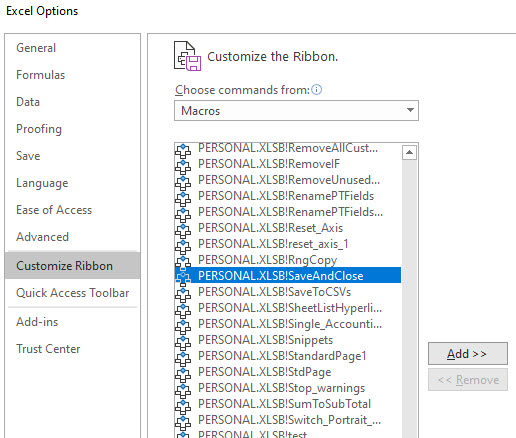
In the dialog that opens click the drop down with Popular Commands and choose Macros – see image below.
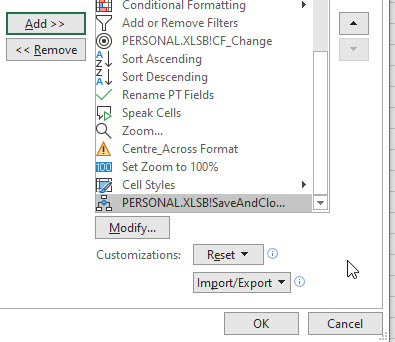
Scroll down (if you need to) and select the SaveAndClose macro and click the Add button.
This adds the macro at the bottom of the list – see image below.
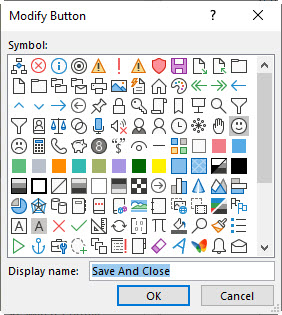
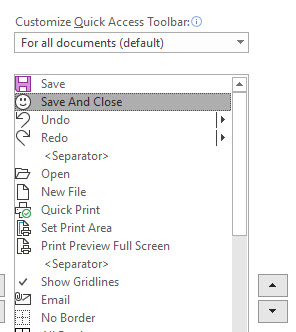
Click the Modify button and change the icon – I will use a smiley face. You can also change the Display name to Save and Close – you can include spaces – see image below.
We can now move the macro up the list on the right by continually clicking the up arrow (Move Up) on the right of the dialog – see image below.
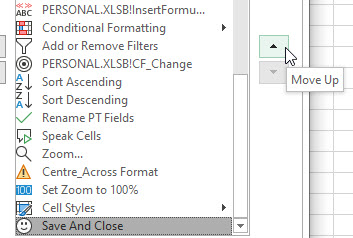
I have moved it to the second position – see image below.
Click OK.
You can now click the icon to save and close the current file.
When you log out of Excel you may be asked to save the Personal file, ensure that you do. This is the Personal Macro Workbook that you selected earlier. It is a hidden file. This will save the macro. Any other macros you add to the Personal Macro Workbook will also have to be saved after you create them.
Keyboard shortcut
Because we have moved it to the second icon on the Quick Access Toolbar we can use an easy keyboard shortcut to run it as well.
If you press the Alt key you will see the letters and numbers in the image below.
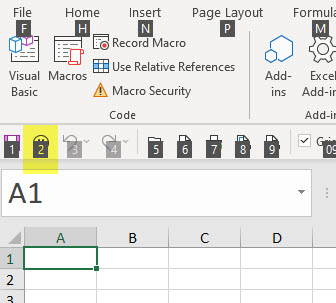
Since the 2 is above the Save and Close macro icon we can now press 2 to run the macro.
If you don’t press 2 you can press the Esc key to clear the letters and numbers after pressing the Alt key.
These Alt key shortcuts are useful, I covered some more in this post.
As you can see macros can also be run via these Alt key shortcuts.
Please note: I reserve the right to delete comments that are offensive or off-topic.