Let’s assume you have three state codes and four department codes and you want to create a table of all the possible 12 combinations (3 x 4). How do you do it so that it is flexible? i.e. if you add a new state or department it must be easy to update the combination table.
Yet another use for Power Query.
(Hat tip to Ken Puls of the Power Query Academy I recently learned this neat trick)
The file used in the video can be downloaded at the bottom of the post.
This combination table has a technical term which I have also just learnt. Its called a Cartesian Product or a Cartesian Join.
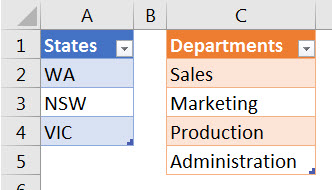
See the image below for our two tables. Both of these have been defined using the Format as Table icon on the Home ribbon (see this article to learn more about Format as Table).
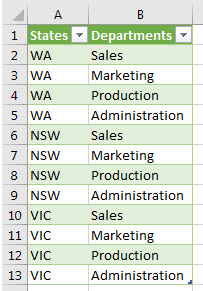
The output we want is shown below.
To achieve this we will create two simple queries, one for each of our tables. Then a third query will merge the two queries to create the combinations in a new table.
Steps (Excel 2016)
- Click a cell in the State table then click the Data ribbon tab click the From table icon

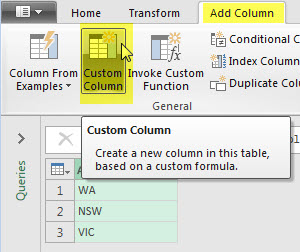
- This opens the Power Query window. Click the Add Column tab and click the Custom Column icon.

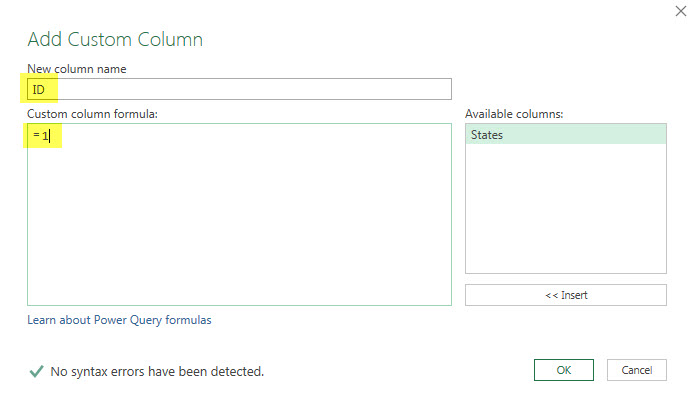
- This opens the Add Custom Column dialog. Change the name to ID and in the formula section enter =1 then click OK.

- This will add a new column to the table with 1 in each of the rows.

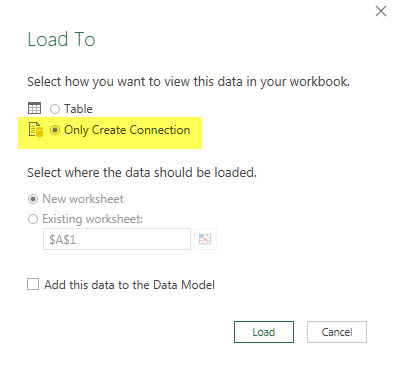
- On the Home ribbon click the Close & Load drop down and choose Close & Load to.

- In the dialog that opens choose Only Create Connection and click Load.

- Repeat steps 1 to 6 for the Department table and it should look like the image below.

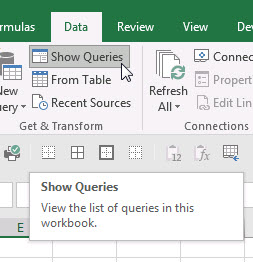
- On the right of screen double click one of the Queries.

- If the Queries are not visible on the right then click the Data ribbon tab click Show Queries.

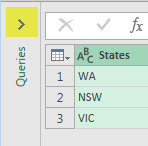
- Click the arrow on the left of the table to display both queries
.
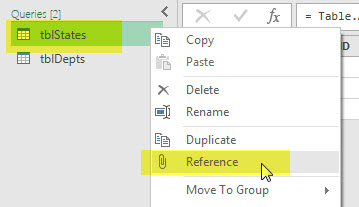
- Right click the tblStates Query on the left and choose Reference.

- This create a third query that we will use to merge the two tables together.
- On the Home ribbon tab click the Merge Queries drop down and then click Merge Queries.

- This opens the Merge dialog. In the top table click the ID column. In the drop down below select the tblDepts Query and when that displays click the ID column in that as well. Click OK.

- We have the tblStates Query with a new column. To see the final table click the opposing arrows in the header of NewColumn.

- In the dialog that opens uncheck the “Use Original column name as prefix” and also uncheck the ID column then click OK.

- The table is created but it still has the ID column which you can delete by selecting it and clicking the Remove Columns icon.

- You can use Close & Load on the Home ribbon tab to create the new table.


This takes a lot longer to explain than it does to create.
The two files I used can be downloaded below.
Please note: I reserve the right to delete comments that are offensive or off-topic.