I use the thin all borders format a lot. But there are times when I need to use the thin outline (outside) borders. This border is not as straight forward to apply to a range.
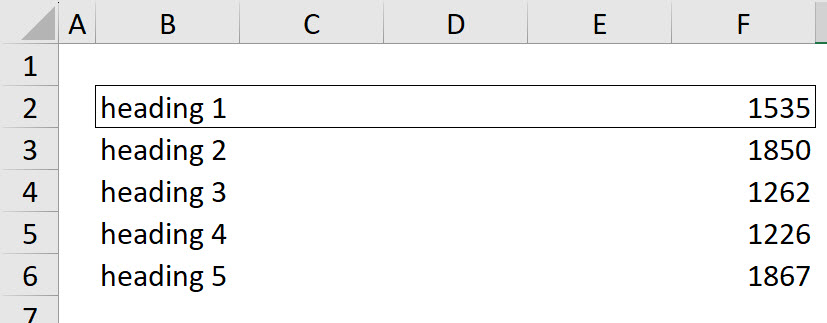
In the image below I have an example of the outline border on row 2.
To apply it to a row you can use the Outside Borders icon in the Borders drop down – image below.
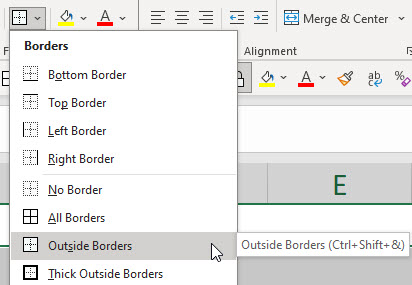
You can see there is even a keyboard shortcut Ctrl + Shift+ &.

It is bit trickier if you want to apply the format on multiple rows in one step. It can be done.
First select the range.
Then click the drop down in the Borders icon and select the last option, More Borders.
In the dialog that opens use the mouse to click and create the line shape as shown in the image below.
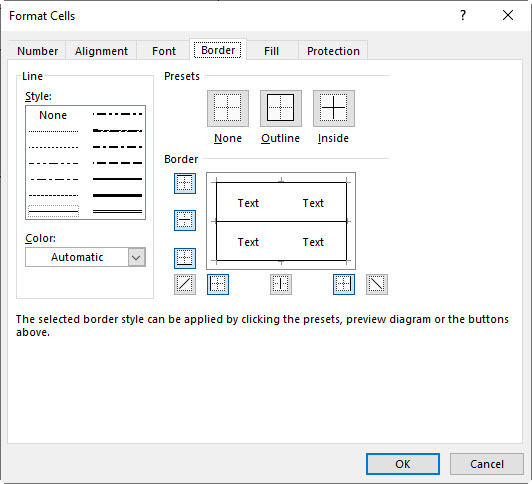
Click OK.
If you use this technique a lot, you can use the macro below to apply the format to the selected range.
Sub OutlineBordersRows() If TypeName(Selection) = "Range" Then With Selection.Borders(xlEdgeLeft) .LineStyle = xlContinuous .Weight = xlThin End With With Selection.Borders(xlEdgeTop) .LineStyle = xlContinuous .Weight = xlThin End With With Selection.Borders(xlEdgeBottom) .LineStyle = xlContinuous .Weight = xlThin End With With Selection.Borders(xlEdgeRight) .LineStyle = xlContinuous .Weight = xlThin End With With Selection.Borders(xlInsideHorizontal) .LineStyle = xlContinuous .Weight = xlThin End With Selection.Borders(xlInsideVertical).LineStyle = xlNone Else MsgBox "Please select a range before running the macro.", _ vbCritical + vbOKOnly, "Range required" End If End Sub |
If you are unsure how to use macros check out the blog post below.
https://a4accounting.com.au/how-to-make-the-most-of-excel-macros/
Please note: I reserve the right to delete comments that are offensive or off-topic.