If you need to hide certain sheets every time an Excel file is opened then a macro may be your solution. Maybe the sheets are working sheets and don’t need to be visible to the user.
An example file is downloadable from the bottom of the post.
There is a special type of macro called an Event macro that will run when a certain event occurs. One such event is when a file is opened. Hence you can create a macro to run each time the file is opened. This does assume that the user has enabled macros.
There are a number of techniques you can use to determine which sheets to hide when the file is opened. I will use a dedicated and named list that is kept in a sheet within the file. When dealing with ranges and macros it is a good idea to use named ranges as this makes the macros more flexible and reliable. The sheet names in the list need to be identical to the actual sheet names – upper and lowercase won’t make a different, but a space character will.
Basically a list of sheet names that you wish to hide is kept in a range and Excel will compare each sheet’s name with that list to determine whether to hide or display the sheet when the file is opened.
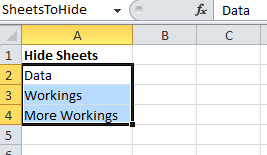
The first step is to create the list with the names of the sheets you wish to hide. It doesn’t matter where you put the list as long as you name it SheetsToHide. To name the list simply select the list and click in the Name Box which is to the left of the formula bar and type SheetsToHide and press Enter. See image below. Make sure there are no spaces in the name. If you need to edit the range to expand it, use the Name Manager on the Formulas Ribbon tab.
Press Alt + F11 to open the VBA window. The event macro must be in the ThisWorkbook module within the VBA window see image below.
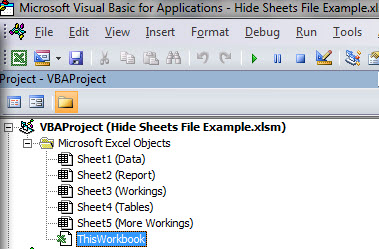
To create the macro you need to double-click on the ThisWorkbook module and click in the window on the right. Click the left-side down and choose Workbook.

This will put the Private Sub and End Sub lines into the code window. You can replace those two lines with the code below to create the macro.
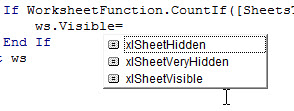
Private Sub Workbook_Open() Dim ws As Worksheet 'hide sheet names listed in the SheetsToHide range name For Each ws In Worksheets If WorksheetFunction.CountIf([SheetsToHide], ws.Name)>0 Then ws.Visible = xlSheetHidden Else ws.Visible = xlSheetVisible End If Next ws Set ws = Nothing End Sub |
The macro uses the xlSheetHidden option which means the user can unhide the sheet from Excel. You can use the option xlSheetVeryHidden (see image below) to stop the user from unhiding in Excel. This won’t list the sheet if they try to unhide. You can still unhide the sheets using the VBA window.
Save the file after you have entered the code.
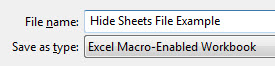
WARNING: If you didn’t have any macros in the file then you will see a warning message displayed regarding saving the file. Make sure you click No and that you select a Excel Macro-Enabled Workbook file type (see below) and then save it.
As mentioned this assumes that the user enables macros when opening the file.
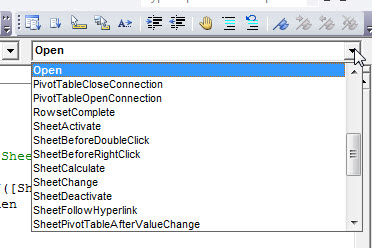
There are many other types of workbook events that Excel can monitor. The drop down list at the top right of the code window has them all – see image below.
There are also worksheet-based events which I will examine in a future blog post.
To see more instructions on how to install and use macros see this blog post.
To unhide all the sheets in a file and also see how to hide the sheets with a normal macro see the blog post.
Click here to see how you can run a Macro off a Quick Access Toolbar icon.
Please note: I reserve the right to delete comments that are offensive or off-topic.