VBA Window Tip
Did you know the right-hand side drop-down, above the code window, lists all the Subs and Functions in a module? Now you do.

Related Posts
Did you know the right-hand side drop-down, above the code window, lists all the Subs and Functions in a module? Now you do.
Just saw an Excel newsletter post from Kevin Jones from https://www.dataautopros.com/about-us/
He found that turning off the VBA interactive setting can speed up some macros. I tested it on a one minute macro and it cut it down to 40 seconds.
Worth a try if you have a longer running macro. You can add it to your opening and closing routines.
Code to turn it off
Application.Interactive = False
And then turn it back on at the end of your code.
Application.Interactive = True
Thanks Kevin for sharing.
The default setting for charts in Excel is to hide the data on the chart if it is hidden on the sheet. I forgot that recently when I created a few charts using a workings area to hold the chart data. I later hid the workings with column grouping. Oops – when you hide the data in the charts go blank.
In my previous post I created a macro from scratch that saved and closed the current file. The macro required that the file had been saved before and wasn’t read only. This post handles those two situations so you run the macro on any file and it will only work when required.
I started using Excel in the late 80’s on a Mac. It had a Save and Close button. When I discovered VBA in Excel on the PC, the very first macro I ever made was save and close.
I thought this would be a good example to take you through creating a macro from scratch and sharing a technique to make it easy to use.
Macros are designed to reduce keystrokes and mouse clicks. Here is a perfect example. It takes seven separate mouse clicks to use an Outlook email template as a new email. Here is a macro that does it in one.
One of the most powerful statements in VBA is Selection. This holds whatever the user has selected just before they ran the macro. Normally it is a range, but what if it isn’t?
If you need to refer to the first cell (top, left cell) in a range there is an easy way to do it.
In a For Next loop you don’t have to include the variable in the Next statement. But ….
There are times when you would like to have the same sheet visible each time a file is opened. You can achieve that with a Workbook Event macro.
When I am creating a file for my training or for my blog or other articles that I write I regularly use the FORMULATEXT function to display the formula in a cell on the right of the actual formula. To save time I created a macro to do the work for me.
I frequently copy an email address from Outlook to Excel and most times it looks like John Smith<jsmith@email.com>. To be used as an email I need to extract from between < and >. To do that in a single cell is tedious, so I wrote a macro to do it for me.
Yes, you can make the text in the VBA window easier to read.
It is also great for training.
(This tip may not work on 4K monitors.)
To open the VBA Window press Alt + F11.
Click the Tools menu and then Options – see image below.

Click the Editor Format tab and change the Size drop down to 14, or whatever you want – see image below.
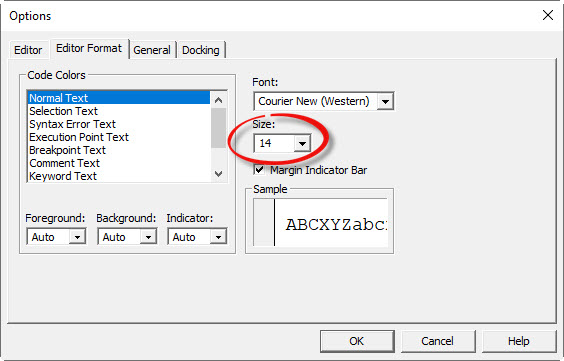
Click OK and the font size will now be increased in the code window.
See below for a comparison between 10 and 14 point.
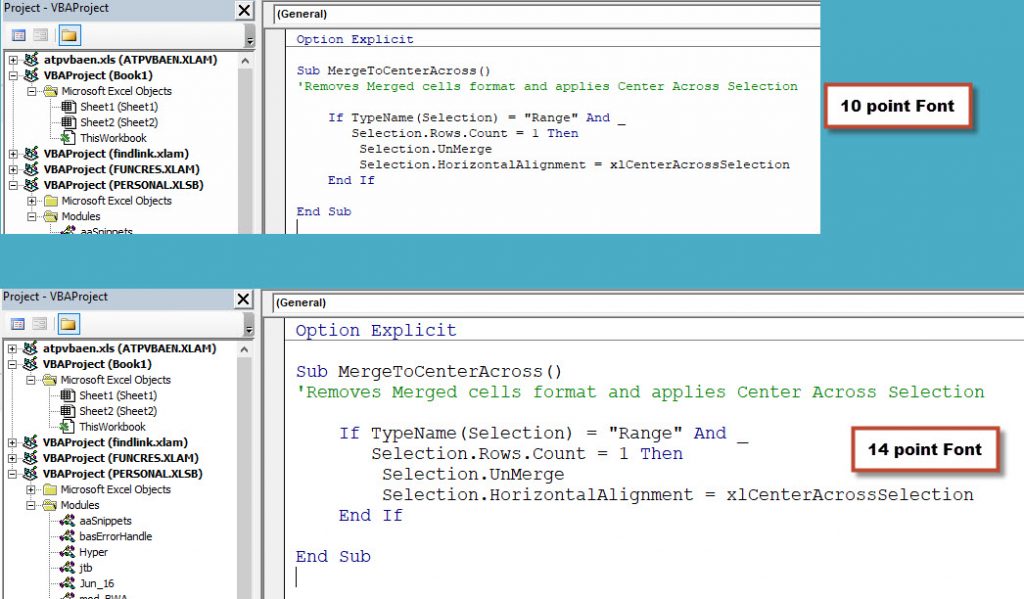
Much easier to read!
It is easy to create a recorded macro. It is not so easy to create a flexible and re-usable recorded macro. Click the materials Button below to download the pdf manual and example file.
Learn the techniques that can allow you to record effective macros that can handle different ranges and changes to sheet names.
Macros can speed up your work and reduce the time taken for tedious tasks, as well as adding functionality to Excel.
This is the first in a series of webinars dedicated to macros. Future paid sessions this month (August 2019) will expand on the techniques taught in this session. Click here to register.
CPD note – if you are claiming CPD for watching this recording you need to keep your own records. People who attend the live sessions receive an annual listing of attendances.
Unfortunately Excel doesn’t have an ISDATE function. Excel’s macro language, VBA does, but there is no spreadsheet function that let’s you know if a cell contains a date. Well there is a partial workaround and you can also use VBA.
In March I wrote a post on using a macro to apply column Autofit on a sheet but with a maximum column width. This is a follow up post as someone requested the same functionality for row height.
The column Autofit on the whole sheet is a great Excel feature. But if you have a few columns that have lots of text it can make using it problematic as you need to manually adjust those wide columns. Here’s a macro to make it easier.
I recently saw a good post on Linkedin from Leila Gharani MVP on increasing the Excel Formula Bar font size. It seems useful for training, so I wrote a simple macro to simplify the process.
Sometimes when writing code you use the same text string in multiple places in your code. To make things easier you should capture that text string in a variable.
I recently found a useful keyboard shortcut for the VBA code window. I tried an Excel shortcut that helped in the VBA window.
Following on from my last two VBA posts here is how you can identify the cell addresses of the first and last cells in a range.
In my last blog post I found the last used row and column numbers on the active sheet. This post lets us find the row and column extremities of a specific range.
When writing VBA code it is common to need to know the last used row and/or the last used column. These values provide the edges of the sheet contents.
When creating macros that work with filters it is a good idea to remove filters at the beginning of the macro code. Here is how you do that.
When you record a macro that refers to a particular cell or range on a particular sheet in Excel the range reference is hard coded into VBA (macro) code. Unfortunately this means if rows or columns are inserted or deleted in the reference range the code is not updated. There is an easy way to get around this.
My book was published in 2014 and part of the writing process was creating an Index. To make the task easier I wrote a macro to assist me. Adding an Index to a large document can improve its usefulness. I am sharing the file I used in this blog post.
In a recent webinar I was asked about the “Too many different cell formats” error. This tends to be an error in Excel 2010 and earlier versions. In many cases this error is caused by having too many custom Styles.
It is common knowledge (or it should be) that running a macro clears the undo list. In general you can’t undo a macro. However some macros also clear the clipboard which can stop you copying and pasting. I have found a workaround for the clipboard problem.
Recently I learned about the passing of Chip Pearson an Excel legend.
He was so generous with his content and I had thanked him for his contributions years back, but it got me thinking about thanking others who had helped me along the way.
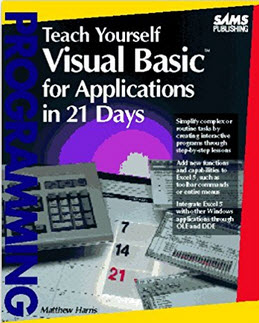
My third thank you goes out to Matthew Harris. Here is a link to his website
Back in the 90’s I taught myself VBA using his book – Teach Yourself Visual Basic For Applications in 21 Days. It has pride of place on my bookshelf.
The book really made a difference to the way I used Excel and opened my eyes to so many possibilities.I found I really enjoyed programming when working in VBA and Excel.
I have learned a lot since, but his book gave me a great grounding in VBA.
Thank you so much Matthew for your book, it has made a huge difference in my life.
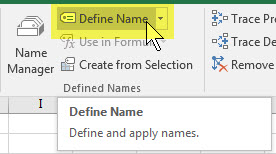
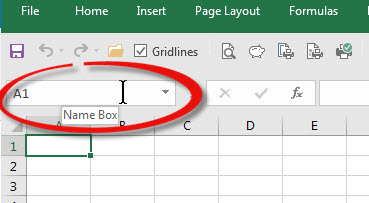
I have found out yet another feature of the Name Box.
The Name Box is on the left of the Formula Bar and above the column letters – see image below.
During a recent macro webinar I tried to create a new range name called Test using the Name Box.
But I also has already created a macro called Test as part of the training.
As soon as I pressed Enter after typing Test into the Name Box to create the Test range name, I was magically transported to the VBA window to the Test macro – Wow!
This means you can’t create a range name in the Name Box that is the same as a macro name.
You have to use the Define name icon on the Formulas tab to do that.